Hello Lovelies,
Yes, it has been a while but I am back and ready to get things going again.
I recently ran out of my favorite Simple brand eye makeup remover and I needed one desperately and thought of other options I can use. First I tried Cetaphil lotion for sensitive skin, as I remembered my mom used to tell me that lotion can remove makeup, but it didn't do it well. So then I thought back to a post I read online that coconut oil is one of the holy grail natural products for all things beauty. I grabbed a spoonful of coconut oil and warmed up a bit between my fingers and like magic all my makeup came off!
Being the search-aholic that I am, I looked into it online and many people have raved about the benefits of using coconut oil as a makeup remover, especially because it can help grow your lashes. I have been using it for a couple of weeks now and see why everyone loves it so much!
Hope you enjoyed this quick little post!
xoxo,
Neika
Tuesday, April 14, 2015
Sunday, January 4, 2015
Happy 2015!
Hello Lovelies,
First let me just say, Happy 2015 and hope this year is the best one yet!
I wanted to post some of the stuff I got for Christmas before the new year but I went on a little trip with family and didn't have the time to do so.
So here is what I received for Christmas!
In no specific order...
Tory Burch Clutch Bag
Love this bag so much it is very versatile and can be worn as a clutch and a shoulder bag. I still need to get the chain strap shortened because being fairly short it is a little long on me!
Marc Jacobs Daisy Perfumes
Well this one is actually a trio but the third one is in my purse because I love the scent so much. There is two classic daisy's which one is fresher scented and the other is the original, and the third one is daisy dream which is such a lovely light scent.
Gold Bar Necklace by Gorjana
Being a person that loves small and intricate jewelery to wear around my neck, I love this necklace. I will most likely have it on 24/7.
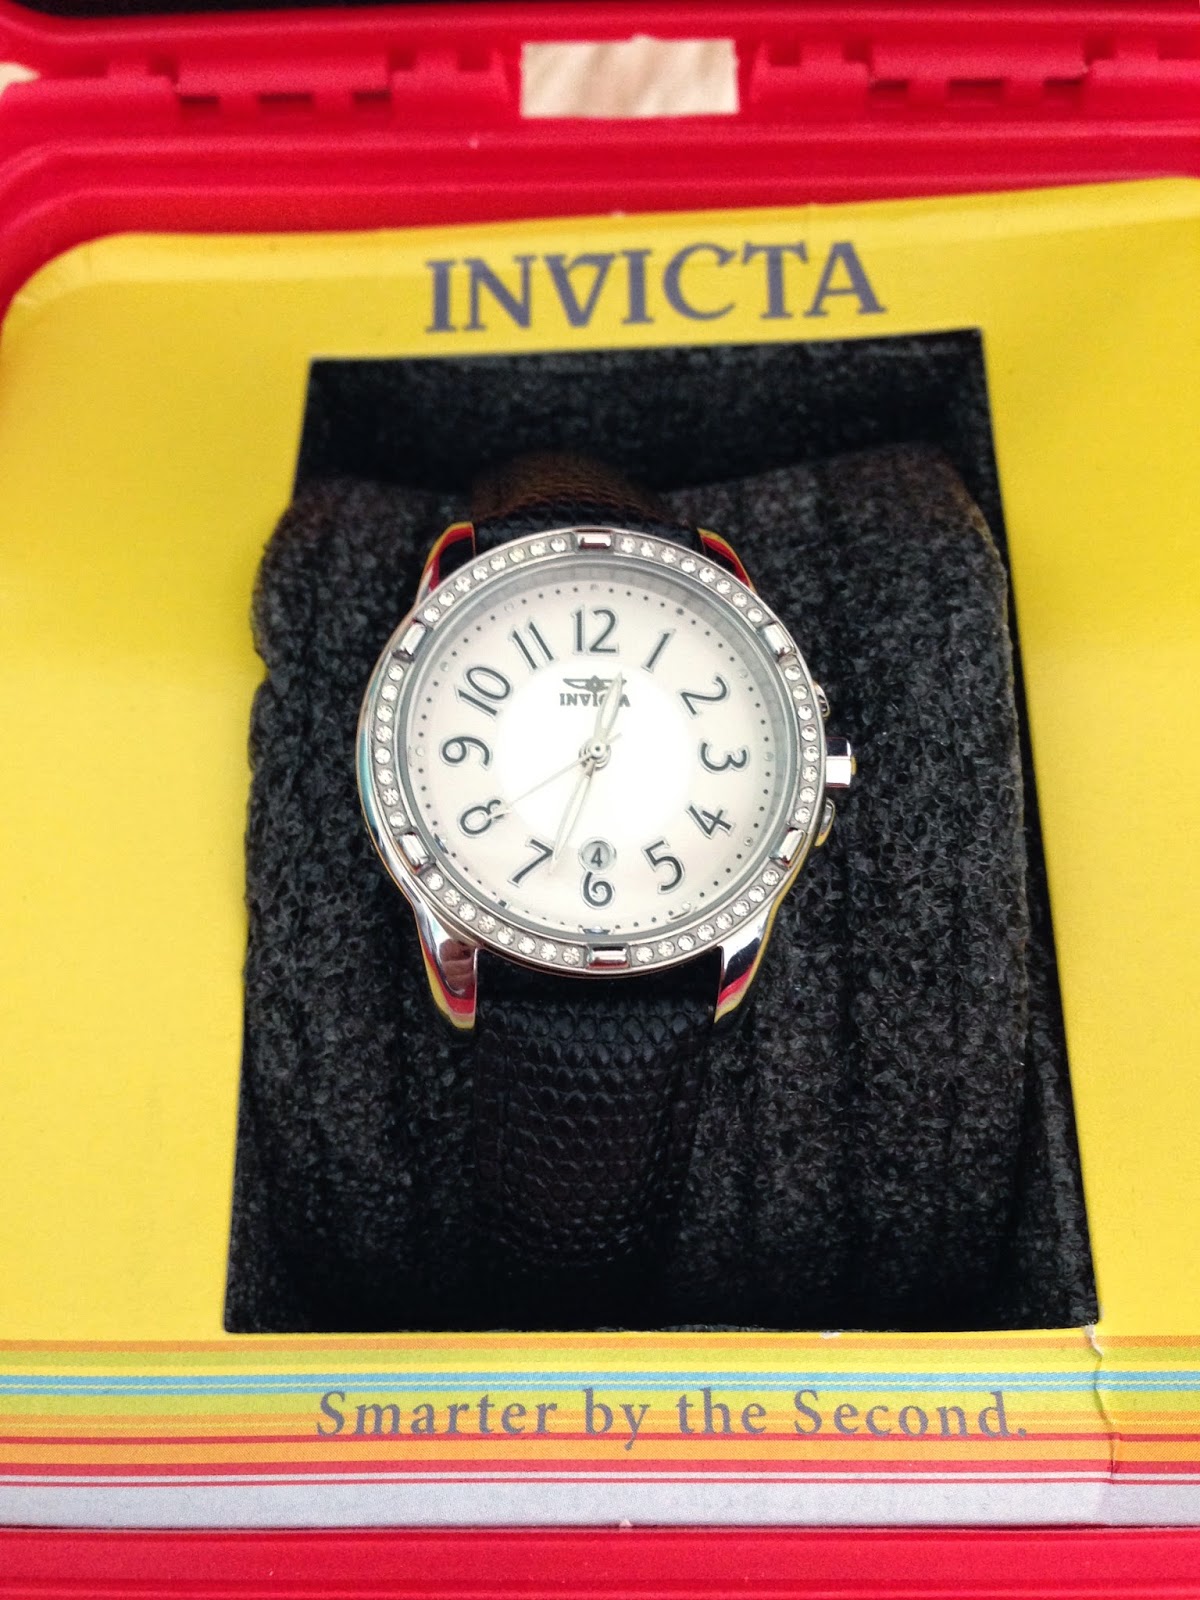
Invicta Watch
This watch, at first, I was unsure about, but it has grown on me and I love it for casual everyday wear. It comes in a super sturdy box that looks like a first aid kit, so I had no idea what was inside of it!
Overall, I loved everything I got for Christmas and there was a few more gifts I got that I didn't post but they where mostly makeup and clothes.
Hope you all had a great Christmas and New Years!
Let me know what your favorite gift was, I would love to know!
Wednesday, October 8, 2014
Fall Makeup 2014
Hello Lovelies,
Although it's fall, it still feels like summer here in California, so I thought that I would get in the fall spirit by doing a fall inspired makeup look. I chose to go for a super simple eye and a dark lip, which seems to be the classic when it's fall time.
So let's get into how I did this look! I am going to go in order of what I applied first...
1. NYX Matte Finish Setting Spray - I apply this first because I like to use it order to give me a matte base.
2. Bare Minerals Bare Skin Foundation Serum - I applied this with a round top kabuki blending brush.
3. Elf Under-eye Highlighter and Concealer - Set this with my Rimmel Stay Matte powder.
4. Airspun Mineral Powder- In translucent to set my foundation.
5. NYX Matte Bronzer - applied with a stiffer fan brush to contour.
6. NYX Blush in Terra Cotta - applied over the contour to give a more glowy look.
7. ELF Neutral Eye Shadow Palette- Took a matte neutral color as my base, added a coppery brown tone to the crease, and highlighted my brow bone with a pale yellow matte shadow.
8. Rocket Volume Mascara- curled my lashed and applied 2 coats of mascara, no eyeliner.
9. NYX Lip Butter in Licorice
btw...don't mind my eyebrows they need to be tamed.
Hope you liked this fall makeup look and let me know what's your favorite makeup product to add to your look this fall! Mines definitely the lipstick!
Although it's fall, it still feels like summer here in California, so I thought that I would get in the fall spirit by doing a fall inspired makeup look. I chose to go for a super simple eye and a dark lip, which seems to be the classic when it's fall time.
1. NYX Matte Finish Setting Spray - I apply this first because I like to use it order to give me a matte base.
2. Bare Minerals Bare Skin Foundation Serum - I applied this with a round top kabuki blending brush.
3. Elf Under-eye Highlighter and Concealer - Set this with my Rimmel Stay Matte powder.
4. Airspun Mineral Powder- In translucent to set my foundation.
5. NYX Matte Bronzer - applied with a stiffer fan brush to contour.
6. NYX Blush in Terra Cotta - applied over the contour to give a more glowy look.
7. ELF Neutral Eye Shadow Palette- Took a matte neutral color as my base, added a coppery brown tone to the crease, and highlighted my brow bone with a pale yellow matte shadow.
8. Rocket Volume Mascara- curled my lashed and applied 2 coats of mascara, no eyeliner.
9. NYX Lip Butter in Licorice
btw...don't mind my eyebrows they need to be tamed.
Hope you liked this fall makeup look and let me know what's your favorite makeup product to add to your look this fall! Mines definitely the lipstick!
Wednesday, September 17, 2014
Oatmeal Chocolate Chip Cookie Recipe
Hello Lovelies,
The best of both world have come together in my new cookie recipe! I show you how to make Oatmeal Chocolate Chip Cookies in my new Youtube video! Check it out and hopefully you try them out for yourself!
Check the video out here!
The best of both world have come together in my new cookie recipe! I show you how to make Oatmeal Chocolate Chip Cookies in my new Youtube video! Check it out and hopefully you try them out for yourself!
Check the video out here!
Friday, August 29, 2014
Back to School Natural Makeup
Hello Lovelies,
My classes have recently started and I have had to change my makeup routine to something more natural and appropriate for school and decided to share my routine with you!
Products I Used In Order of Applying:
Neutrogena Shine Control Primer
CoverGirl Outlast Foundation
ELF Undereye Highlighter and Concealer
NYX Stay Matte But Not Flat Powder
NYX Apricot Blush
NYX Yogurt Eye Pencil (smudged on the bottom inner corner and lid)
Sephora Felt Tip Liner (small flick eyeliner)
Maybelline Rocket Volume Mascara
I love this look for school and an everyday natural makeup!
Monday, August 25, 2014
Review: Sally Hansen Miracle Gel Nail Polish
Hello Lovelies,
I have recently come across the new nail polish by Sally Hansen called Miracle Gel Polish. As you can tell lately many different nail polish brands have been coming out with a line of "gel" polishes but this one has stood out to me and has surprisingly done what it claims!
So Sally Hansen claims that it lasts up to 14 days and it is a easy 2 step process that requires no light to cure the gel, and I can personally agree with all these claims!
I applied the nail polish over 2 weeks ago and it has just started to chip and that is only at the base of my nail where the nail polish was thinner. The look of the polish basically looks like gel polish except isn't quite as shiny as the actual thing but compared to regular polish it is definitely shinier and looks thicker like gel.
This polish, I would say, is amazing and is great for those who want the look and lasting strength of gel polish without having to have the real thing done. It is relatively inexpensive and comes in a good range of colors that suits everyone! I would definitely recommend this polish.
Here is a picture of my nails after 2 coats of the polish and a coat of the gel top coat! I love this color so much that I will probably be wearing it all fall!
Sunday, August 24, 2014
DIY Canvas Art
Hello Lovelies,
Recently I was in the spirit to do some DIY projects and found some inspiration from Pinterest and from a local store! This DIY can be tailored to each individual and is super customizable.
The first canvas represents my home state and my county! It is a super cute idea that can be changed to wherever you live! The second one is my zodiac sign in which I personally think matches me to a T!
Home State Canvas
What you will need:
8x10 Canvas (pick a size you like!)
Water Based Paint (color: Island Blue)
Glitter Paint
Red Puffy T-shirt Paint
Brushes
Print out of your state (plain paper)
How To:
1. Paint the base with 2 solid coats of your chosen paint color.
2. While the base is drying cut the state out of the print out leaving the boarder intact. (to that you basically have made a paper stencil)
3. Once the base is dry place your state in the center and tape down a few of the sides to hold it in place.
4. Take the glitter paint and apply it with an inward motion starting on the paper stencil into the open area of your state. (brush from stencil into the canvas to avoid stencil leaks) Approx. 3 layers
5. When it is almost dry take your puffy paint and draw a heart where your city/county is and state the name.
6. Let dry and add a frame if you desire!
Zodiac Canvas
What you will need:
8x10 Canvas
2 Paint colors (same color different shades)
Zodiac Sign Print Out
White Puffy T-shirt Paint
Stick on Crystals
How To:
1. Take your darker paint and apply it to the top of the canvas. When you reach the quarter mark add a few drops of the lighter shade to the darker on and apply it to the canvas repeating every few intervals to end up with the lighter shade and an ombre effect.
2. While that is drying cut out your sign just as indicated in the home state canvas to make a stencil and stick it on to the center once the base is dry with a few pieces of tape.
3. Take your puffy paint and dot the outline first and then fill the outline with more dots! Adding crystals randomly as you go.
4. Remove the stencil and let dry! Puffy paint takes a little while to set!
These are my two DIY Canvas Art pieces! Hopefully you find my instructions easy to follow and try this out, as it is very affordable and fun to do!
Subscribe to:
Posts (Atom)