Wednesday, October 8, 2014

Fall Makeup 2014

Hello Lovelies,

Although it's fall, it still feels like summer here in California, so I thought that I would get in the fall spirit by doing a fall inspired makeup look. I chose to go for a super simple eye and a dark lip, which seems to be the classic when it's fall time.


So let's get into how I did this look! I am going to go in order of what I applied first...

1. NYX Matte Finish Setting Spray - I apply this first because I like to use it  order to give me a matte base.
2. Bare Minerals Bare Skin Foundation Serum - I applied this with a round top kabuki blending brush.
3. Elf Under-eye Highlighter and Concealer - Set this with my Rimmel Stay Matte powder.
4. Airspun Mineral Powder- In translucent to set my foundation.
5. NYX Matte Bronzer - applied with a stiffer fan brush to contour.
6. NYX Blush in Terra Cotta -  applied over the contour to give a more glowy look.
7. ELF Neutral Eye Shadow Palette- Took a matte neutral color as my base, added a coppery brown tone to the crease, and highlighted my brow bone with a pale yellow matte shadow.
8. Rocket Volume Mascara- curled my lashed and applied 2 coats of mascara, no eyeliner.
9. NYX Lip Butter in Licorice

btw...don't mind my eyebrows they need to be tamed.

Hope you liked this fall makeup look and let me know what's your favorite makeup product to add to your look this fall! Mines definitely the lipstick!


Wednesday, September 17, 2014

Oatmeal Chocolate Chip Cookie Recipe

Hello Lovelies,

The best of both world have come together in my new cookie recipe! I show you how to make Oatmeal Chocolate Chip Cookies in my new Youtube video! Check it out and hopefully you try them out for yourself!


Check the video out here! 


Friday, August 29, 2014

Back to School Natural Makeup

Hello Lovelies,

My classes have recently started and I have had to change my makeup routine to something more natural and appropriate for school and decided to share my routine with you!


Products I Used In Order of Applying:

Neutrogena Shine Control Primer
CoverGirl Outlast Foundation
ELF Undereye Highlighter and Concealer
NYX Stay Matte But Not Flat Powder
NYX Apricot Blush
NYX Yogurt Eye Pencil (smudged on the bottom inner corner and lid)
Sephora Felt Tip Liner (small flick eyeliner)
Maybelline Rocket Volume Mascara

I love this look for school and an everyday natural makeup!

Monday, August 25, 2014

Review: Sally Hansen Miracle Gel Nail Polish

Hello Lovelies,

I have recently come across the new nail polish by Sally Hansen called Miracle Gel Polish. As you can tell lately many different nail polish brands have been coming out with a line of "gel" polishes but this one has stood out to me and has surprisingly done what it claims!


So Sally Hansen claims that it lasts up to 14 days and it is a easy 2 step process that requires no light to cure the gel, and I can personally agree with all these claims!

I applied the nail polish over 2 weeks ago and it has just started to chip and that is only at the base of my nail where the nail polish was thinner. The look of the polish basically looks like gel polish except isn't quite as shiny as the actual thing but compared to regular polish it is definitely shinier and looks thicker like gel.

This polish, I would say, is amazing and is great for those who want the look and lasting strength of gel polish without having to have the real thing done. It is relatively inexpensive and comes in a good range of colors that suits everyone! I would definitely recommend this polish.

Here is a picture of my nails after 2 coats of the polish and a coat of the gel top coat! I love this color so much that I will probably be wearing it all fall!


Sunday, August 24, 2014

DIY Canvas Art

Hello Lovelies,

Recently I was in the spirit to do some DIY projects and found some inspiration from Pinterest and from a local store! This DIY can be tailored to each individual and is super customizable.

 The first canvas represents my home state and my county! It is a super cute idea that can be changed to wherever you live! The second one is my zodiac sign in which I personally think matches me to a T!

Home State Canvas

What you will need:

8x10 Canvas (pick a size you like!)
Water Based Paint (color: Island Blue)
Glitter Paint
Red Puffy T-shirt Paint
Brushes
Print out of your state (plain paper)

How To:
1. Paint the base with 2 solid coats of your chosen paint color.
2. While the base is drying cut the state out of the print out leaving the boarder intact. (to that you basically have made a paper stencil)
3. Once the base is dry place your state in the center and tape down a few of the sides to hold it in place.
4. Take the glitter paint and apply it with an inward motion starting on the paper stencil into the open area of your state. (brush from stencil into the canvas to avoid stencil leaks) Approx. 3 layers
5.  When it is almost dry take your puffy paint and draw a heart where your city/county is and state the name.
6. Let dry and add a frame if you desire!

Zodiac Canvas

What you will need:

8x10 Canvas
2 Paint colors (same color different shades)
Zodiac Sign Print Out
White Puffy T-shirt Paint
Stick on Crystals

How To:
1. Take your  darker paint and apply it to the top of the canvas. When you reach the quarter mark add a few drops of the lighter shade to the darker on and apply it to the canvas repeating every few intervals to end up with the lighter shade and an ombre effect.
2. While that is drying cut out your sign just as indicated in the home state canvas to make a stencil and stick it on to the center once the base is dry with a few pieces of tape.
3. Take your puffy paint and dot the outline first and then fill the outline with more dots! Adding crystals randomly as you go.
4. Remove the stencil and let dry! Puffy paint takes a little while to set!

These are my two DIY Canvas Art pieces! Hopefully you find my instructions easy to follow and try this out, as it is very affordable and fun to do!


Saturday, July 26, 2014

Get to Know Me TAG!

Hello Lovelies,

It's time for another TAG! I made a video for my YouTube channel answering questions about myself so you can get to know me better!


Check out my video! Hopefully you enjoy it and don't forget to subscribe!


Tuesday, July 22, 2014

Secret Family Waffle Recipe

Hello Lovelies,

I am back with another recipe! Since I now have time in the mornings to make breakfast I love to experiment and get creative, but this recipe has been one that has been in my family for a while!


It's my families secret waffle recipe!

What you will need:

1 cup of flour
1 tsp of baking soda
1 tsp of baking powder
1 egg
1 cup of milk

How to make it: 

This is literally one of the simplest recipes I have ever come across and it is always the one I go back to! To start add in the flour, baking soda and baking powder, and mix them together. Then, add the cup of milk and combine! The next step is possibly the trickiest part of the entire recipe, separate the yolk and the white of the egg and put the yolk into the mixture. Take a fork and whisk up the egg whites till there are stiff peaks, yes takes a little arm strength ;). Once you have the peaks, fold it into the mixture just until it is combined, and that is it! Pour the mixture into your waffle maker and you will have amazing homemade waffles in no time!

Hope you all try out this recipe and enjoy it!


Monday, July 14, 2014

Vanilla Iced Coffee

Hello Lovelies,

Today's post is a recipe! This one is super easy and a coffee lovers dream for a summer drink!


What you will need:

A mug of fresh brewed coffee
Milk (I used low-fat but use whatever you like)
Vanilla extract
3 Sugar cubes
Mason Jar
Ice

How to put it together: 

First, take the mason jar and fill a quarter of the jar with milk and ice. Then, take the mug of coffee and add the 3 sugar cubes and a splash of vanilla. Mix that together and using a spoon slowly pour the coffee mixture into the jar, spoonful by spoonful. Yes, that is a little tedious but I couldn't find another way to make the milk to coffee transition stand out :(. Lastly, take a straw and take a nice refreshing sip of this delicious simple iced coffee!

Hope you try out this simple yet delicious iced coffee!


Monday, July 7, 2014

Summer Lookbook 2014

Hello Lovelies,

Summer is in full throttle and I have decided to make a post on some of my favorite summer outfits!


My first outfit is a paisley patterned romper with sandal wedges. Super cute for a nice dinner out with friends! 

Next is a boho chic look that is perfect for any summer day! Long flowy maxi skirt and a cute frilly top accompanied with round glasses. 

Last but not least is my total casual everyday summer wear that is stylish yet super simple to put together. Colored shorts and a cute top! 

Check out my lookbook here: 


Tuesday, June 10, 2014

Summer Makeup Routine

Hello Lovelies,

Since summer is around the corner I thought I would show you my summer makeup routine! I know I haven't posted for a while now, but now that I am off of school and have a bit more free time, I will be posting again!

This look is very easy and simple, it has hints of peach and pink throughout and is a full coverage look with the attempt of looking very light and natural.

Hope you guys enjoy the video of my Summer Makeup Routine!


Wednesday, March 26, 2014

Spring Makeup Look

Hello Lovelies,

Since spring has just begun, I thought I would do a spring makeup look that would be simple yet still make a statement! I used bright colors on my lip and cheeks and kept the rest of my face really simple and bright.


Products I Used: 
Primer: BareMinerals Prime Time Foundation Primer 
Foundation: Benefits Hello Flawless 
Under Eye Concealer: NYX HD Concealer
Concealer: MAC Pro Longwear 
Powder: NYX Stay Matte But Not Flat 
Bronzer: Elf Warm Bronzer
Blush: NYX in Ethereal 
Eyeliner: Intense Kajal Eyeliner by Estee Lauder
Mascara: Smashbox Full Exposure
Eyebrow Gel: Milani Clear Gel
Lips: NYX Creamy Lipstick in Heather
 
I applied the products in that order but you can definitely use them in any order you prefer! Here is how the finished look turned out...


Friday, March 14, 2014

FOTD: Golden Eyes & Dark Lips

Hello Lovelies,

I realized that I have posted for a week or two so I thought I'd make a comeback with a face of the day! This face of the day is more of a night look so it technically is a FOTN (face of the night), but I really liked how it turned out to I'm going to share it with you all!

Here is the look:


Foundation: Covergirl Outlast
Concealer: Nyx HD Concealer
Powder: Airspun Translucent
Bronzer & Highlight: Benefit Perfect 10
Eye Primer: Smashbox Photo Finish
Eyeshadow (lid): Eternal Sunshine
Eyeshadow (crease): Any Matte Brown Shade
Eyeliner: Shephora Waterproof Retractable Liner
Mascara: Maybelline Rocket Volum'
Lipstick: Nyx Creamy Lipstick in Mauve

Hopefully you enjoyed this post! Oh, and yes I did plan to match my lipstick to my shirt ;)


Saturday, March 1, 2014

DIY Make-up Brush Holder

Hello Lovelies,

So I have just uploaded my second YouTube video tutorial! I demonstrate how to make a do it yourself make-up brush holder. It was really simple to make and it holds a ton of brushes while looking so cute.

Here is how mine turned out...


I did the cute little bow design really quickly and easily through 4 simple steps! Here is my video, hope you guys enjoy!


Thursday, February 20, 2014

elf Nail Polishes: Worth it or Not?

Hello Lovelies,

I thought I would go for a slightly different type of post today, reviewing a product and answering the question of is it worth the buy or not.


So over Christmas holiday I got a gift consisting of 14 different elf nail polishes. I though that it was a brilliant gift seeing that I love everything about nail polish!

I first tried on the pale pink polish just to see how it was and I loved that it applied very easily and that it dried very quick. The color is so great that you could possibly pull off just applying one coat. One downside was that the smell is incredibly strong. After two days passed, the polish started chipping like crazy! Oh and not to mention that smell I talked about earlier lingered on after it was dry and through multiple washes of my hands. It made me a little sad that its application was so easy and quick but the later result was pretty terrible.

I have tried other colors since then and they all have pretty much the same effect a few days after application.
 ...But the only polishes that are truly good out of the 14 are the glitter polishes. They last and are a great addition to any polish style, and for some reason these ones don't smell as bad.

Overall, I wouldn't personally go out of my way to buy these because they do chip pretty quickly and the quality is not that good, which is expected for these affordable polishes. If you do purchase any of these I would definitely go for the glitter polishes!


**Click the new Mini Store Tab to see handmade products I am selling!**
Thanks guys!

Saturday, February 8, 2014

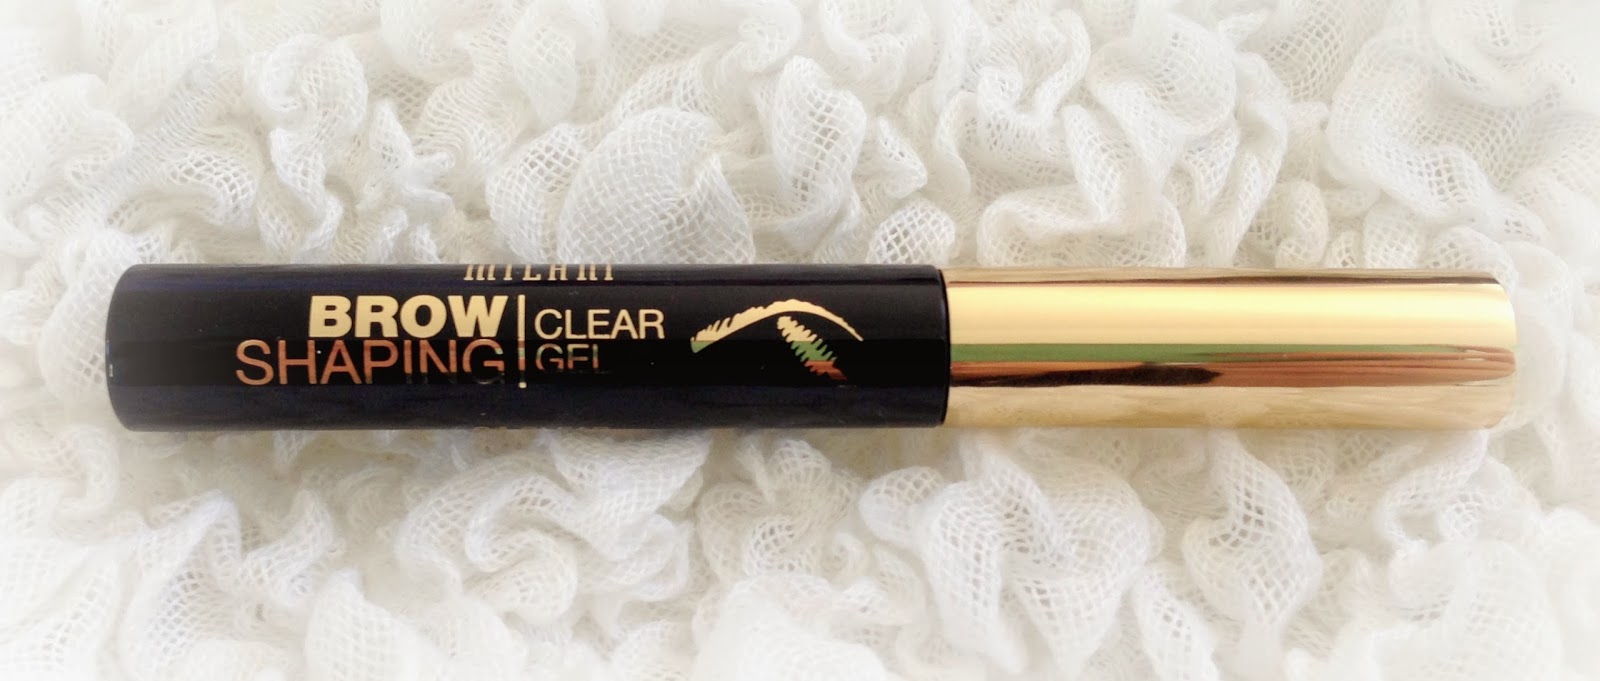
Review: Milani Brow Shaping Gel

Hello Lovelies,

My brows have always unruly and even when they are freshly threaded they still have hairs that just don't want to stay in place. So I decided to try out a new product to solve my problem, the Milani Brow Shaping Gel.


It comes in a super classy bottle and has a spool tip brush. The gel is clear but when applying it kinda looks milky which I don't really like but it ends up drying clear. I got mine in the medium to strong hold and I was kinda skeptical because I thought it would make my brows look ...hmm whats the right word ... crispy. But once again it proved me wrong my brows feel smooth and looks as tho they don't have product built up on them.
I personally would apply this after all my makeup is done as a final touch to pull everything together.

So far am am liking this product and it has been working great! Oh, and it was reasonably priced, which is a plus!

Hope you enjoyed this post!


Sunday, February 2, 2014

Simple Valentine's Nails

Hello Lovelies,

So I have decided to start a YouTube page along with my blog to help bring my posts to life!

Today I have done a cute simple Valentine's Day nail tutorial that I think is super easy to achieve. Here is how they turned out...

I chose to go put a little twist on the classic red polish by using small gold glitter pieces on the base of each nail.

Here are the products that I used...


I applied my Sally Hansen Hard as Wraps as my base coat and let that dry. Then I applied two layers of the Revlon polish in Valentine. After that I used my Elf in gold glitter and applied it to a bit of scrap paper I had lying around and used a pin to pick up individual pieces of glitter and gently applied it to the base of each nail. Then I took my Wet n' Wild top coat and applied it to all my nails.

Here is my little tutorial on how I did my nails!


Hope you enjoyed this post!


Friday, January 31, 2014

Review: IT Cosmetics Tightline

Hello Lovelies,

Sorry I haven't posted in a few days! My spring semester just began and it has been hectic but I am back!

Recently I have been trying out a new product from IT Cosmetics called the Tightline Full Lash Length Mascara Primer. I had it on hand but never used it until a few weeks ago, and it has got me hooked!

Here is what the tightline looks like...


Basically this product has taken the concept of tightlining your upper lash line and turned it into a tightline and mascara combo. It gives that look of full lashes while separating and priming your lashes at the base!

The wand of this product is super slim and gets into the base of your lashes effortlessly.


Here is how I use it:
Take the wand and bring it as close to your lash line as possible. Just make sure not to poke your eye! Then I like to rotate my hand toward my face so that the wand gets in closer to my lash line. This motion will evenly coat and darken the base of your lashes and with the rotating movement it will start separating your lashes at the base! After, I like to bring the wand halfway up my lashes to prime them for mascara. Then I just add my mascara of choice and it makes your lashes look amazingly full!

I would totally recommend this product to everyone because you can choose to use it on its own for a light effect for maximize it with mascara!

Hope you enjoyed this post!


Saturday, January 25, 2014

Favorite Skincare Products & Skincare Routine

Hello Lovelies,

I have recently found my favorite skincare products and routine that has helped clear up and rejuvenate my skin. I always thought that my skin was really stubborn and could handle harsh products but low and behold my skin is actually pretty sensitive and I changed all my products to ones that are mild and that don't have harsh ingredients. Here are the products I use:

  • Yes To Soothing Daily Gel Cleanser 
    • Super soothing and gentle yet works wonders on removing makeup and daily impurities.
  • Fresh Soy Face Cleanser 
    • Gentle and great at revitalizing your skin in the morning.
  • Muji High Moisturizing Toner 
    • Works wonders! It basically takes the place of a moisturizer. Yes, its that moisturizing yet still works as a toner. 
  • Clarisonic Mia 2
In the mornings I get the warm water running and wash my face with my Fresh Soy Cleanser and then pat my face dry. Then I apply the Muji toner to my face with a cotton ball. 

At night I also get the warm water running and then use my Clarisonic Mia 2. I run the bristles under the water and apply a squeeze of the Yes To Cleanser to the bristles and wash my face to the timed buzzes of the Clarisonic. (And yes this removes all my makeup! Amazing right!) Then I go in with the Muji Toner and apply that once again to my face and that's it!

Hopefully you guys enjoyed this post! Let me know if you have any questions on the products!

Thursday, January 23, 2014

Lip of the Day: Mauve Madness

Hello Lovelies,

I am posting a quick lip of the day for you guys! This lip has been my new favorite ever since I received my NYX products.


It is in the color Mauve and it is a nice dark rosy color. I don't think this picture does it justice, but it is very close to it! It is the perfect color for a night out or even to give you a sultry dark look in the daytime. The texture of the lipstick is very creamy and applies smoothly onto the lips. Blot it with a napkin and the color stays but it gives you a great matte effect. I think it is a very versatile color and great for almost anytime of the day!

Hope you guys enjoyed this quick lip of the day!


Sunday, January 19, 2014

Mini NYX Haul

Hello Lovelies,

I recently ordered some makeup from NYX Cosmetics and I am going to share what I got with you guys!


Bronzer & Blusher in Marbella


HD Photogenic Concealer in Medium


Extra Creamy Round Lipstick in Heather & Mauve


Matte Black Liner

Jumbo Eye Pencil in Yogurt

Butter Lip Balm in Macaron


I have tried all the products I bought and I love them all, but I must say that I love the lipstick in mauve the most! 

Hope you guys enjoyed what I got and make sure to ask me any questions!